
How to Map Your Customer Journey in StoryMint (Every Touchpoint, Every Persona)
Stop planning touchpoints in isolation. Here is how StoryMint's Customer Journey Mapping shows what every persona thinks and feels at each stage of your funnel, then tells you exactly what to publish.
 Ridho Putradi S'GaraFounder, StoryMint
Your customer does not go from stranger to buyer in one step. They see a post, read an article, compare a product page, check a marketplace listing, and somewhere along that path they either convert or quietly drop off. The problem is that most marketers plan each of those touchpoints in isolation, guessing at what the customer is feeling and what they need to see next.
Customer journey mapping fixes that by laying the whole path out in front of you, then showing you what each persona is thinking and feeling at every stage. StoryMint's Customer Journey Mapping tool does this automatically. You define the stages, and it generates the emotions, thoughts, pain points, and content opportunities for each persona at each one. Here is how to run it from start to finish.
What journey mapping actually gives you
A journey map is a stage-by-stage view of how a persona moves through your funnel, annotated with what they experience at each step. StoryMint builds this by taking two things you already have, your funnel stages and your personas, and filling in the human layer between them: how each persona feels at each touchpoint, what worries them, and what content would move them forward.
The output is a grid of touchpoints. In the Prenagen example, five stages across five personas produced twenty-nine individual touchpoint insights, each one a small, specific brief for what to say to that person at that moment. That is the payoff. You stop guessing what to publish and start seeing it mapped out.
Step 1: Create your journey map
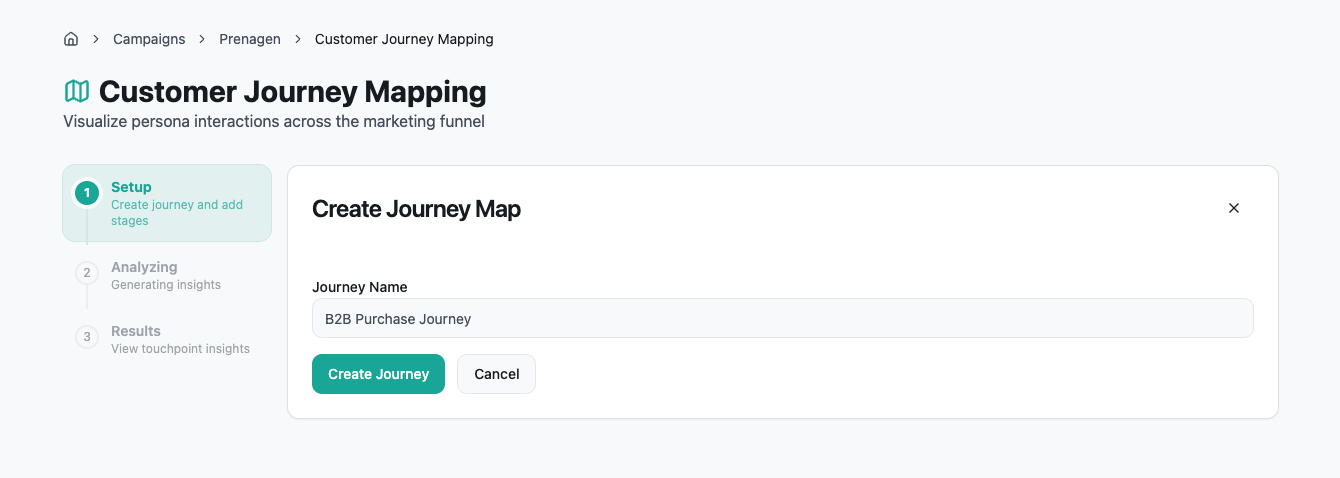
Open Customer Journey Mapping from your campaign and click to create a new map. The only thing you need here is a Journey Name. Give it something that describes the path you are modeling, like "Instagram to purchase" or "B2B Purchase Journey." Then click Create Journey.
Name the journey after the actual route you want to understand. You can build more than one, so keep each map focused on a single path rather than trying to cram every possible route into one. A tight, well-named journey is far easier to act on later.
Step 2: Add your stages
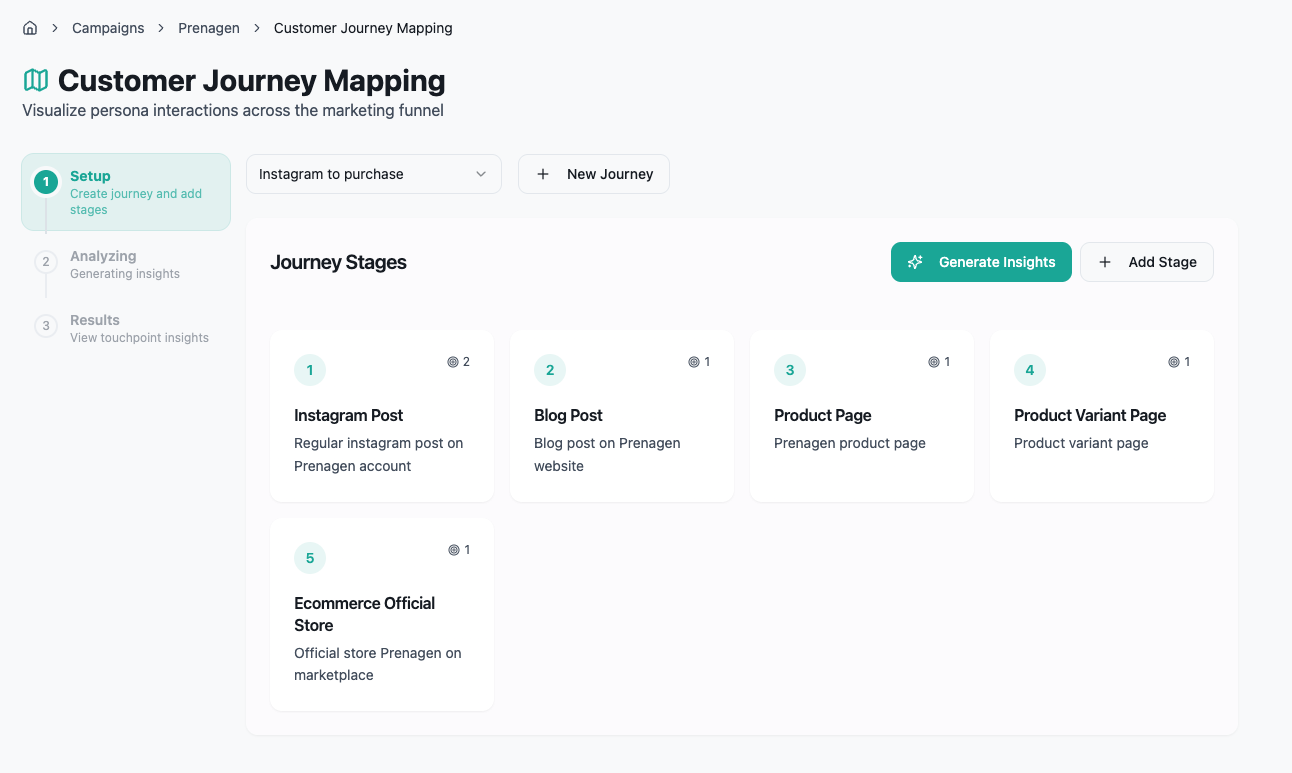
Now you build the funnel. Each stage is a touchpoint where your customer meets your brand, and you add them in the order the customer encounters them. Click Add Stage and fill in two fields: a Stage Name and a short Description of what happens there.
In the Prenagen journey, the stages run in a natural sequence: an Instagram Post ("regular Instagram post on Prenagen account"), a Blog Post ("blog post on Prenagen website"), a Product Page, a Product Variant Page, and finally the Ecommerce Official Store ("official store Prenagen on marketplace"). That is a clean top-to-bottom funnel, from first discovery on social all the way to checkout on a marketplace.
Add as many stages as your real journey has. The descriptions matter more than they look, because they tell the AI exactly what kind of touchpoint each stage is, which sharpens the insights it generates. Once your stages are laid out in order, you are ready to analyze.
Step 3: Generate insights
Click Generate Insights. StoryMint moves to the Analyzing step and starts mapping the journey, working through each persona's emotions, thoughts, and touchpoint opportunities across every stage you defined. A progress bar tracks it, and the whole thing usually finishes in a few seconds. This is where the tool does the work you would otherwise spend hours on, imagining how five different people feel at five different moments.
Step 4: Read your touchpoint insights
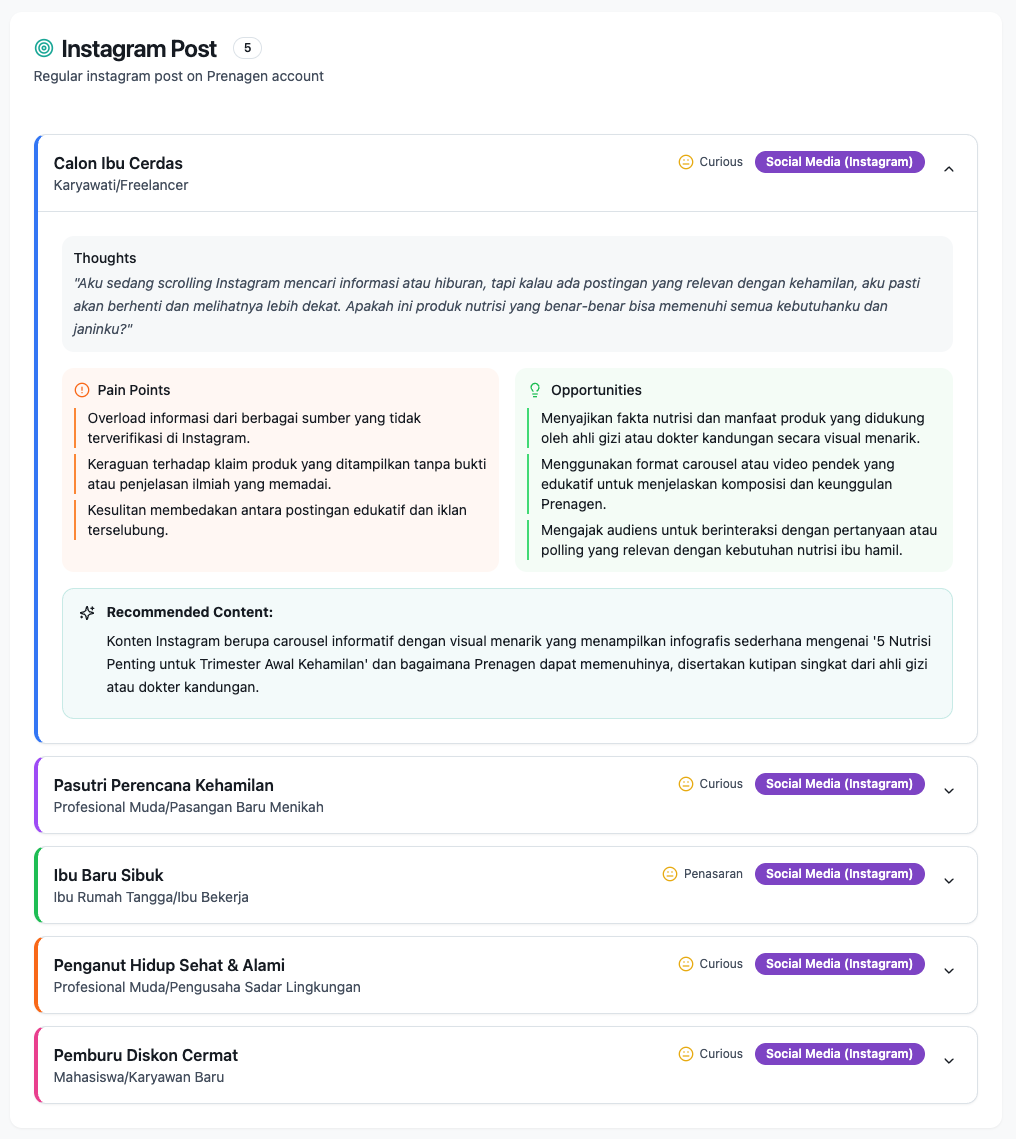
When it finishes, the Results screen shows your Journey Touchpoints, with a running count of how many were generated. Along the top you get filter chips: All Personas plus one chip per persona, so you can view the whole map or zero in on a single customer type. If you only care about how the discount-hunter moves through your funnel, click their chip and the view narrows to just them.
The insights are grouped by stage. Under each stage, every persona gets a card showing two things at a glance: their emotion at that touchpoint and the channel it lives on. Emotions are specific and honest, ranging from curious and hopeful at the top of the funnel to more cautious states like careful or anxious near checkout. That emotional arc alone is useful, because it shows you where confidence builds and where hesitation creeps in.
Expand any card and you get the full brief for that touchpoint:
Thoughts: a first-person quote capturing what that persona is actually thinking in the moment, in their own voice
Pain Points: the specific frictions and doubts holding them back at this stage
Opportunities: the openings you have to address those doubts and move them forward
Recommended Content: a concrete suggestion for what to publish or change at this touchpoint
For example, at the Instagram stage the "smart expecting mother" persona is curious but wary of unverified claims and hidden ads. The recommended content is an informative carousel with simple infographics on essential nutrition for early pregnancy, backed by a quote from a nutritionist or doctor. That is not a vague note to "post more on Instagram." It is a ready-to-brief piece aimed at a real doubt.
Read across a single persona to see their emotional journey change stage by stage, and read down a single stage to see how differently your personas react to the same touchpoint. Both views tell you something. The first shows you where a persona loses momentum. The second shows you which touchpoints are doing double duty and which ones only work for one type of customer.
Step 5: Turn the map into action
Once you have your touchpoints, use the map to prioritize. Look for the cards where a persona feels anxious or hesitant, because those are the moments most likely to cost you a conversion, and the recommended content there is your highest-leverage fix. Then work back up the funnel, tightening the message at each stage so the emotional arc trends toward confidence by the time they reach checkout.
You can Export PDF to share the full map with your team, a designer, or a client, so everyone is briefing the same touchpoints from the same insights. And when your funnel changes, or you want to model a different path, hit New Analysis and build another journey.
Putting it all together
The whole loop, name the journey, add your stages, generate insights, then read the touchpoints, turns an abstract funnel into a specific, persona-by-persona plan. Instead of one generic content calendar, you get a map that tells you what each customer needs to hear at each step, and where they are most likely to slip away.
A simple habit works best: build one journey map per key path, review the anxious and hesitant touchpoints first, and brief the recommended content for those before anything else. Do that and your funnel stops being a series of disconnected posts and starts being a guided path, one where every touchpoint is answering a real thought in your customer's head.
Ready to see your funnel through your customers' eyes? Open Customer Journey Mapping, name your first journey, and add the stages your customers actually move through. StoryMint will fill in the rest.


